Применение Windows API - [29]
>void Blitter::BlitTo(Canvas& canvas) {
> // Create canvas in memory using target canvas as template
> MemCanvas memCanvas (canvas);
> // Convert bitmap to the format appropriate for this canvas
> memCanvas.SelectObject(_bmp);
> // Transfer bitmap from memory canvas to target canvas
> ::BitBlt(canvas, _xDst, _yDst, _width, _height, memCanvas, _xSrc, _ySrc, _mode);
>}
The API, BitBlt, transfers bits from one device to another. That's why we have to set up a fake source device. This "memory canvas" is based on the actual canvas--in this case we use target canvas as a template. So, for instance, if the target canvas describes a True Color device, our MemCanvas will also behave like a True Color device. In particular, when our bitmap is selected into it, it will be converted to True Color, even if initially it was a monochrome or a 256-color bitmap.
The simplest program that loads and displays a bitmap might look something like this: There is a View object that contains a bitmap (I assume that the file "picture.bmp" is located in the current directory). It blits it to screen in the Paint method.
>class View {
>public:
> View() {
> _background.Load("picture.bmp");
> }
> void Paint(Canvas& canvas) {
> Blitter blitter(_background);
> blitter.BlitTo(canvas);
> }
>private:
> Bitmap _background;
>};
A sprite is an animated bitmap that moves over some background. We already know how to display bitmaps — we could blit the background first and then blit the sprite bitmap over it. This will work as long as the sprite is rectangular. If you want to be more sophisticated and use a non-rectangular sprite, you need a mask.
The two pictures below are that of a sprite (my personal pug, Fanny) and its mask. The mask is a monochrome bitmap that has black areas where we want the sprite to be transparent. The sprite, on the other hand, must be white in these areas. What we want is to be able to see the background through these areas.
The trick is to first blit the background, then blit the mask using logical OR, and then blit the sprite over it using logical AND.
ORing a black mask pixel (all zero bits) with a background pixel will give back the background pixel. ORing a white mask pixel (all one bits) with a background will give a white pixel. So after blitting the mask, we'll have a white ghost in the shape of our sprite floating over the background.
ANDing a white sprite pixel (all ones) with a background pixel will give back the background pixel. ANDing a non-white sprite pixel with the white (all ones) background (the ghost from previous step) will give the sprite pixel. We'll end up with the sprite superimposed on the background.
What remains is to implement the animation. The naive implementation would be to keep re-drawing the image: background, mask and sprite, changing the position of the mask and the sprite in each frame. The problem with this approach is that it results in unacceptable flutter. The trick with good animation is to prepare the whole picture off-line, as a single bitmap, and then blit it to screen in one quick step. This technique is called double buffering — the first buffer being the screen buffer, the second one — our bitmap.
We'll also use Windows timer to time the display of frames.
>class WinTimer {
>public:
> WinTimer(HWND hwnd = 0, int id = -1) : _hwnd (hwnd), _id (id) {}
> void Create(HWND hwnd, int id) {
> _hwnd = hwnd;
> _id = id;
> }
> void Set(int milliSec) {
> ::SetTimer(_hwnd, _id, milliSec, 0);
> }
> void Kill() {
> ::KillTimer(_hwnd, _id);
> }
> int GetId() const {
> return _id;
> }
>private:
> HWND _hwnd;
> int _id;
>};
We'll put the timer in our Controller object and initialize it there.
>class Controller {
>public:
> Controller(HWND hwnd, CREATESTRUCT* pCreate);
> ~Controller();
> void Timer(int id);
> void Size(int x, int y);
> void Paint();
> void Command(int cmd);
>private:
> HWND _hwnd;
> WinTimer _timer;
> View _view;
>};
>Controller::Controller(HWND hwnd, CREATESTRUCT * pCreate) : _hwnd (hwnd), _timer (hwnd, 1), _view(pCreate->hInstance) {
> _timer.Set (100);
>}
Once set, the timer sends our program timer messages and we have to process them.
>LRESULT CALLBACK MainWndProc(HWND hwnd, UINT message, WPARAM wParam, LPARAM lParam) {
> Controller* pCtrl = WinGetLong
> switch (message) {
> ...
> case WM_TIMER:
> pCtrl->Timer(wParam);
> return 0;
> ...
> }
> return ::DefWindowProc(hwnd, message, wParam, lParam);
>}
>void Controller::Timer(int id) {
> _timer.Kill();
> _view.Step();
> UpdateCanvas canvas(_hwnd);
> _view.Update(canvas);
> ::InvalidateRect(_hwnd, 0, FALSE);
> _timer.Set(50);
>}
>void Controller::Paint() {
> PaintCanvas canvas(_hwnd);
> _view.Paint(canvas);
>}
The Update method of View is the workhorse of our program. It creates the image in the buffer. We then call InvalidateRectangle to force the repaint of our window (the last parameter, FALSE, tells Windows not to clear the previous image — we don't want it to flash white before every frame).
Here's the class View, with the three bitmaps.
>class View {
>public:
> View(HINSTANCE hInst);
> void SetSize(int cxNew, int cyNew) {
> _cx = cxNew;
> _cy = cyNew;

Java Enterprise Edition (Java EE) остается одной из ведущих технологий и платформ на основе Java. Данная книга представляет собой логичное пошаговое руководство, в котором подробно описаны многие спецификации и эталонные реализации Java EE 7. Работа с ними продемонстрирована на практических примерах. В этом фундаментальном издании также используется новейшая версия инструмента GlassFish, предназначенного для развертывания и администрирования примеров кода. Книга написана ведущим специалистом по обработке запросов на спецификацию Java EE, членом наблюдательного совета организации Java Community Process (JCP)

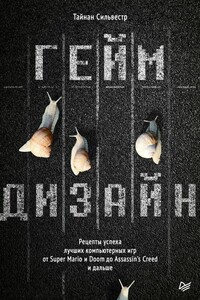
Что такое ГЕЙМДИЗАЙН? Это не код, графика или звук. Это не создание персонажей или раскрашивание игрового поля. Геймдизайн – это симулятор мечты, набор правил, благодаря которым игра оживает. Как создать игру, которую полюбят, от которой не смогут оторваться? Знаменитый геймдизайнер Тайнан Сильвестр на примере кейсов из самых популярных игр рассказывает как объединить эмоции и впечатления, игровую механику и мотивацию игроков. Познакомитесь с принципами дизайна, которыми пользуются ведущие студии мира! Создайте игровую механику, вызывающую эмоции и обеспечивающую разнообразие.

В книге рассказывается история главного героя, который сталкивается с различными проблемами и препятствиями на протяжении всего своего путешествия. По пути он встречает множество второстепенных персонажей, которые играют важные роли в истории. Благодаря опыту главного героя книга исследует такие темы, как любовь, потеря, надежда и стойкость. По мере того, как главный герой преодолевает свои трудности, он усваивает ценные уроки жизни и растет как личность.

В книге рассказывается история главного героя, который сталкивается с различными проблемами и препятствиями на протяжении всего своего путешествия. По пути он встречает множество второстепенных персонажей, которые играют важные роли в истории. Благодаря опыту главного героя книга исследует такие темы, как любовь, потеря, надежда и стойкость. По мере того, как главный герой преодолевает свои трудности, он усваивает ценные уроки жизни и растет как личность.

В книге рассказывается история главного героя, который сталкивается с различными проблемами и препятствиями на протяжении всего своего путешествия. По пути он встречает множество второстепенных персонажей, которые играют важные роли в истории. Благодаря опыту главного героя книга исследует такие темы, как любовь, потеря, надежда и стойкость. По мере того, как главный герой преодолевает свои трудности, он усваивает ценные уроки жизни и растет как личность.

Python - объектно-ориентированный язык сверхвысокого уровня. Python, в отличии от Java, не требует исключительно объектной ориентированности, но классы в Python так просто изучить и так удобно использовать, что даже новые и неискушенные пользователи быстро переходят на ОО-подход.