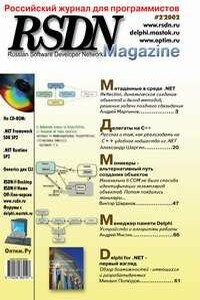
DirectX 8. Начинаем работу с DirectX Graphics - [13]
Note that it is stretched/squashed to fit the rectangle. You can adjust that by adjusting the texture coordinates. For example, if you change the lines where u = 1.0 to u = 0.5, then only half of the texture is used and the remaining part will not be squashed. So, if you had a 640x480 image that you wanted to place on a 640×480 window, you could place the 640×480 image in a 1024×512 texture and specify 0.625, 0.9375 for the texture coordinates. You could use the remaining parts of the texture to hold other sub images that are mapped to other panels (through the appropriate texture coordinates). In general, you want to optimize the way textures are used because they are eating up graphics memory and/or moving across the bus. This may seem like a lot of work for a blit, but it has a lot to do with the way new cards are optimized for 3D (like it or not). Besides, putting some thought into how you are moving large chunks of memory around the system is never a bad idea. But I'll get off my soapbox.
Let's see where we are so far. At one level, we've written a lot of code to blit a simple bitmap. But, hopefully you can see some of the benefit and the opportunities for tweaking. For instance, the texture coordinates automatically scale the image to the area we've defined by the geometry. There are lots of things this does for us, but consider the following. If we had set up our ortho matrix to use a percentage based mapping, and we specified a panel as occupying the lower quarter of the screen (for a UI, let's say), and we specified a texture with the correct texture coordinates, then our UI would automagically be drawn correctly for any chosen window/screen size. Not exactly cold fusion, but it's one of many examples. Now that we have the texture working well, we have to get back to talking about transparency.
As I said before, one easy way of adding transparency is to specify a color key value in the call to D3DXCreateTextureFromFileEx. Another is to use an image that actually has an alpha channel. Either way, specify a texture with some transparency (either with an alpha channel or a color key value) and run the app. You should see no difference. This is because alpha blending is not enabled. To enable alpha blending, add these lines to PostInitialize:
>g_pd3dDevice->SetRenderState(D3DRS_ALPHABLENDENABLE, TRUE);
>g_pd3dDevice->SetRenderState(D3DRS_SRCBLEND, D3DBLEND_SRCALPHA);
>g_pd3dDevice->SetRenderState(D3DRS_DESTBLEND, D3DBLEND_INVSRCALPHA);
>g_pd3dDevice->SetTextureStageState(0, D3DTSS_ALPHAOP, D3DTOP_MODULATE);
The first line enables blending. The next two specify how the blending works. There are many possibilities, but this is the most basic type. The last line sets things up so that changing the alpha component of the vertex colors will fade the entire panel by scaling the texture values. For a more in depth discussion of the available settings, see the SDK. Once these lines are in place, you should see the proper transparency. Try changing the colors of the vertices to see how they affect the panel.
By now our panel has many of the visual properties we need, but it's still stuck in the center of our viewport. For a game, you probably want things to move. One obvious way is to relock the vertices and change their positions. DO NOT do this!! Locking is very expensive, involves moving data around, and is unnecessary. A better way is to specify a world transformation matrix to move the points. For many people, matrices may seem a bit scary, but there are a host of D3DX functions that make matrices very easy. For example, to move the panel, add the following code to the beginning of Render2D:
>D3DXMATRIX Position;
>D3DXMatrixTranslation(&Position, 50.0f, 0.0f, 0.0f);
>g_pd3dDevice->SetTransform(D3DTS_WORLD, &Position);
This creates a matrix that moves the panel 50 pixels in the X direction and tells the device to apply that transform. This could be wrapped into a function like MoveTo(X, Y), which I won't actually give the code for. Earlier I said to remember the fact that the vertex code specified the vertices around the origin. Because we did that, translating (moving) the position moves the center of the panel. If you are more comfortable with moving the upper left or some other corner, change the way the vertices are specified. You could also create different coordinate systems by correcting the parameters sent to the MoveTo function. For example, our viewport currently goes from —100 to +100. If I wanted to use MoveTo as if it were going from 0 to 200, I could simply correct for it in my call to D3DXMatrixTranslation by subtracting 100 from the X position. There are many ways to quickly change this to meet your specific needs, but this will provide a good basis for experimentation.
There are many other matrix operations that will affect the panel. Perhaps the most interesting are scaling and rotation. There are D3DX functions for creating these matrices as well. I'll leave the experimenting up to you, but here are a few hints. Rotation about the Z-axis will create rotation on the screen. Rotating about X and Y will look like you are shrinking Y and X. Also, the way you apply multiple operations is through multiplication and then sending the resulting matrix to the device:

Java Enterprise Edition (Java EE) остается одной из ведущих технологий и платформ на основе Java. Данная книга представляет собой логичное пошаговое руководство, в котором подробно описаны многие спецификации и эталонные реализации Java EE 7. Работа с ними продемонстрирована на практических примерах. В этом фундаментальном издании также используется новейшая версия инструмента GlassFish, предназначенного для развертывания и администрирования примеров кода. Книга написана ведущим специалистом по обработке запросов на спецификацию Java EE, членом наблюдательного совета организации Java Community Process (JCP)

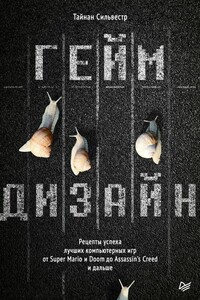
Что такое ГЕЙМДИЗАЙН? Это не код, графика или звук. Это не создание персонажей или раскрашивание игрового поля. Геймдизайн – это симулятор мечты, набор правил, благодаря которым игра оживает. Как создать игру, которую полюбят, от которой не смогут оторваться? Знаменитый геймдизайнер Тайнан Сильвестр на примере кейсов из самых популярных игр рассказывает как объединить эмоции и впечатления, игровую механику и мотивацию игроков. Познакомитесь с принципами дизайна, которыми пользуются ведущие студии мира! Создайте игровую механику, вызывающую эмоции и обеспечивающую разнообразие.

В книге рассказывается история главного героя, который сталкивается с различными проблемами и препятствиями на протяжении всего своего путешествия. По пути он встречает множество второстепенных персонажей, которые играют важные роли в истории. Благодаря опыту главного героя книга исследует такие темы, как любовь, потеря, надежда и стойкость. По мере того, как главный герой преодолевает свои трудности, он усваивает ценные уроки жизни и растет как личность.

В книге рассказывается история главного героя, который сталкивается с различными проблемами и препятствиями на протяжении всего своего путешествия. По пути он встречает множество второстепенных персонажей, которые играют важные роли в истории. Благодаря опыту главного героя книга исследует такие темы, как любовь, потеря, надежда и стойкость. По мере того, как главный герой преодолевает свои трудности, он усваивает ценные уроки жизни и растет как личность.

В книге рассказывается история главного героя, который сталкивается с различными проблемами и препятствиями на протяжении всего своего путешествия. По пути он встречает множество второстепенных персонажей, которые играют важные роли в истории. Благодаря опыту главного героя книга исследует такие темы, как любовь, потеря, надежда и стойкость. По мере того, как главный герой преодолевает свои трудности, он усваивает ценные уроки жизни и растет как личность.

Python - объектно-ориентированный язык сверхвысокого уровня. Python, в отличии от Java, не требует исключительно объектной ориентированности, но классы в Python так просто изучить и так удобно использовать, что даже новые и неискушенные пользователи быстро переходят на ОО-подход.